How to Prepare for a Student Visa Journey
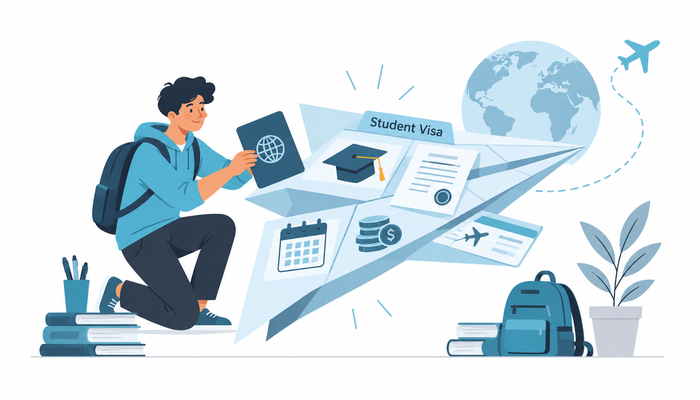
How to Prepare for a Student Visa Journey: From Admission to Arrival
When I first thought about applying for a student visa, I imagined the difficult part would be getting accepted to a university.
Once I had the admission letter, I thought the rest would mostly be paperwork.
It was not that simple.
A student visa journey is really several projects happening at the same time:
University admission.
Immigration preparation.
Financial planning.
Document collection.
Housing.
Insurance.
Travel.
And preparation for life after arrival.
The visa application sits in the middle of all of that.
That is why I stopped thinking:
“How do I get my student visa?”
and started asking:
“How do I prepare the entire journey so one missing step does not disrupt everything else?”
That question creates a much stronger plan.
Start Before You Receive the Admission Letter
One of the biggest mistakes is waiting for final admission before preparing everything else.
Some tasks can begin much earlier.
You can already:
Check passport validity.
Research student immigration requirements.
Estimate financial needs.
Collect academic records.
Research insurance.
Understand document translation requirements.
Compare housing.
Build a timeline.
Create a financial buffer.
You should not prepare time-sensitive documents too early if the relevant authority requires recent evidence.
But you can identify them.
That alone can save weeks later.
Step 1: Understand the Full Journey
Do not treat the visa application as one isolated task.
A realistic student journey may look like:
Program research → Admission application → Offer → Financial preparation → Student visa/residence application → Decision → Housing and departure → Arrival → Local registration/enrollment
Each stage may depend on another.
For example:
You may need admission before applying for immigration permission.
You may need proof of finances before submission.
You may need insurance at a particular stage.
You may need accommodation information.
The exact requirements depend on the destination and status.
Map the sequence before you start.
Step 2: Build a Master Requirements List
Create four separate sections.
University Requirements
These may include:
Degree.
Transcript.
Language results.
References.
Statement of purpose.
Portfolio.
Entrance exam.
Immigration Requirements
Potentially:
Passport.
Admission documentation.
Financial evidence.
Forms.
Photographs.
Insurance.
Biometrics.
Civil documents.
Other destination-specific evidence.
Relocation Requirements
Housing.
Travel.
Budget.
Local transportation.
Phone.
Banking preparation.
Post-Arrival Requirements
University enrollment.
Residence formalities.
Address registration where applicable.
Insurance activation.
Other local procedures.
Keeping these categories separate prevents one huge checklist from becoming confusing.
Step 3: Check Your Passport Early
This sounds simple, but it can quietly affect the entire timeline.
Check:
Expiry date.
Condition.
Name spelling.
Available validity for the intended period.
Whether renewal is likely to be necessary before applying.
If your passport needs renewal, deal with that before building the rest of the process around the old document.
Also make sure your name appears consistently across:
Admission records.
Degree.
Language certificates.
Financial documents.
Civil documents.
Small inconsistencies are much easier to investigate early.
Step 4: Create a Document Tracker
Do not rely on memory.
Create a table.
Document | Needed For | Status | Timing | Translation? | Validity |
Passport | Immigration | Ready | Now | No | Check |
Admission Letter | Immigration | Pending | After offer | No | Check |
Transcript | University | Requested | Now | Maybe | Usually stable |
Bank Evidence | Immigration | Not ready | Later | Maybe | Time-sensitive |
Insurance | Immigration/Arrival | Researching | Later | No | Policy-specific |
The most useful column is:
Timing
Some documents should be prepared early.
Others should be obtained closer to submission.
That distinction can prevent wasted money and expired evidence.
Step 5: Understand Financial Requirements Properly
Student visa planning is where many people confuse:
Having money
with:
being able to prove financial readiness in the required way.
A destination may require specific financial evidence.
Depending on the system, this could involve:
Personal savings.
Sponsor funds.
Scholarships.
Blocked or designated accounts.
Income evidence.
Other accepted arrangements.
The rules vary.
Do not rely on a friend's old application.
Check current official instructions.
Then create a second number:
Your real student budget.
Formal financial eligibility and real-life affordability are different.
Step 6: Build Your Real Student Budget
Suppose your first-year plan looks like this:
Tuition: €14,000
Housing: €10,800
Food and transport: €5,400
Insurance and other basics: €1,800
Travel and setup: €2,000
Direct total:
€34,000
Now add:
Housing deposit.
Temporary accommodation.
Unexpected document expenses.
Emergency travel.
A genuine emergency fund.
The real amount may be meaningfully higher.
That does not mean you need unlimited savings.
It means your financial plan should survive something going slightly wrong.
Step 7: Separate Tuition Money From Living Money
This was one of the most useful budgeting changes for me.
Instead of one account mentally labeled:
Study Abroad Money
I would divide it into:
Tuition
Money committed to education.
Relocation
Travel, luggage, temporary housing, deposit, initial setup.
Monthly Living
Rent, food, transport, phone, insurance.
Emergency
Money that should ideally remain untouched.
This makes it much easier to see whether your plan is genuinely affordable.
Step 8: Do Not Depend on Part-Time Work to Rescue the Budget
Many students plan like this:
“I will arrive and find a part-time job.”
Maybe you will.
But that is too uncertain to be the foundation of your financial plan.
You may face:
Work restrictions.
Language barriers.
Limited vacancies.
Class schedules.
Exam periods.
A delayed job search.
Do not build a budget that collapses if it takes three months to find student work.
Where student work is permitted, treat it as useful support rather than guaranteed survival income.
Step 9: Understand the Student Immigration Timeline
Do not assume the timeline begins when you submit your application.
It starts earlier.
You may need:
Admission.
Financial preparation.
Language evidence.
Insurance.
Appointments.
Documents.
And possibly third-party verification.
Then after submission, there may be processing.
Then after approval, you still need:
Notice period if working.
Housing.
Travel.
Departure.
A useful timeline should therefore include:
Preparation → Submission → Processing → Decision → Departure
Not only processing time.
Step 10: Add Buffers
Student plans often contain fixed dates:
Semester start.
Enrollment deadlines.
Accommodation start dates.
Orientation.
Travel.
That makes delays more stressful.
Build margin around the steps you do not control.
For example:
Document issuance.
Appointment availability.
Third-party verification.
Immigration processing.
Housing confirmation.
Do not assume everything will happen on the earliest possible date.
Practical Example: Maya's Six-Month Preparation Plan
Imagine Maya receives conditional admission for a master's program.
Her course begins in September.
March
Review student immigration requirements
Check passport
Build financial plan
Request missing university documents
April
Complete remaining academic conditions
Research insurance
Research housing
Organize document folder
May
Receive final admission
Prepare financial evidence
Prepare student immigration application
June
Submit when eligible
Continue housing search
Protect financial buffer
July
Prepare practical relocation tasks
Avoid irreversible travel commitments until appropriate
August
Finalize housing if possible
Prepare travel
Organize physical and digital documents
Build first-month plan
Maya still has uncertainty.
But she is not waiting for one stage to finish before thinking about the next.
Step 11: Prepare for a Possible Interview
Some student immigration processes may involve an interview or additional questions.
If yours does, preparation should focus on clarity and consistency.
You should be able to explain:
Why this program?
Why this institution?
Why this academic level?
How does it connect to your previous education?
How does it connect to your career?
How will you finance your studies?
What is your study plan?
Do not memorize artificial scripts.
The strongest answers are usually the ones that reflect a coherent plan.
If you cannot explain why the program makes sense, that may be a planning problem rather than an interview problem.
Step 12: Make Sure Your Academic Story Makes Sense
Your application should tell one understandable story.
For example:
Bachelor's in economics → three years in finance → master's in business analytics → data-focused finance career
That progression is easy to understand.
If your study choice is a major change, be prepared to explain the logic.
A career change can be completely reasonable.
But the connection should be intentional.
Ask:
“Why this program now?”
If you have a strong answer, the entire plan usually becomes clearer.
Step 13: Keep Digital Backups of Everything
Create secure copies of:
Passport.
Admission letter.
Academic documents.
Language certificate.
Financial documents.
Insurance.
Housing documents.
Application confirmation.
Important correspondence.
Use clear filenames.
For example:
Passport_Current.pdf
University_Admission.pdf
Bank_Evidence_July.pdf
Insurance_Certificate.pdf
Do not rely on:
scan-23-final-new.pdf
Good organization becomes especially valuable while traveling.
Step 14: Track Important Dates
Create one calendar containing:
University deadline.
Tuition deadline.
Visa appointment.
Document expiry.
Insurance start.
Housing start.
Orientation.
Semester start.
Travel window.
This prevents academic and immigration deadlines from living in separate systems.
Your study plan should have one master timeline.
Step 15: Research Housing Before the Visa Decision
This requires balance.
You may not want to make expensive non-refundable commitments too early.
But waiting until approval to learn anything about housing can also create problems.
Research:
Student residences.
Private rooms.
Shared apartments.
Temporary housing.
Average deposits.
Commuting.
Neighborhoods.
Scams.
Application procedures.
Then decide when a financial commitment becomes appropriate for your specific situation.
Research early.
Commit carefully.
Step 16: Understand Insurance Before Buying It
Do not assume every insurance product satisfies every requirement.
You may need insurance for:
Immigration.
University enrollment.
Residence.
Daily life.
These may or may not be the same thing.
Check:
When coverage must begin.
What type is accepted.
Whether you transition to another insurance system after arrival.
Avoid buying something only because another student used it.
Their circumstances may differ.
Step 17: Prepare Your First Month Abroad
A successful student visa journey does not end at the airport.
Your first month may involve:
University enrollment.
Housing.
Banking.
Transport.
Insurance.
Local registration.
Phone service.
Groceries.
Campus orientation.
Class preparation.
Create a Month One checklist before leaving.
This reduces the cognitive load when everything is new.
Your First-Month Budget Will Probably Be Higher
Month One is often more expensive than Month Four.
Why?
Deposit.
Household basics.
Temporary accommodation.
Transport setup.
SIM card.
Unexpected purchases.
Food before routines are established.
So do not calculate your financial runway using only a normal monthly budget.
Include a separate setup amount.
Step 18: Prepare for Academic Adjustment
Student visa planning often focuses heavily on immigration and not enough on studying.
But moving into a new academic system can be challenging.
You may face:
Different grading.
Independent study expectations.
Academic writing.
Group projects.
Presentations.
Different professor relationships.
Language pressure.
Prepare academically too.
The goal is not simply to arrive.
It is to succeed once classes start.
Step 19: Think About Career From Day One
If part of the reason you chose international education is career growth, do not wait until graduation to plan employment.
From the beginning:
Research employers.
Build your professional profile.
Attend career events.
Develop local language.
Build projects.
Look for internships.
Understand recruiting seasons.
Network.
A degree does not automatically produce employment.
Your career strategy should run alongside your study strategy.
Step 20: Research Post-Study Options Before You Leave Home
This is essential if you hope to remain after graduation.
Do not assume:
Student status → graduate → work → long-term residence
Each transition can have separate conditions.
Before choosing the program, understand:
Whether post-study options exist.
Whether your program is relevant to them.
Whether institution type matters.
How long you may have to search for work.
What kind of employment may be required.
How the next status works.
Because rules can change, current official sources should be checked again near the relevant stage.
Common Mistakes in a Student Visa Journey
Waiting Until Admission to Start Planning
Many tasks can be researched earlier.
Treating Financial Proof as the Whole Budget
Official thresholds may not reflect real costs.
Depending on Immediate Part-Time Work
Employment is never guaranteed.
Preparing Time-Sensitive Documents Too Early
Validity matters.
Booking Non-Refundable Travel Too Soon
Estimated timelines are not guarantees.
Ignoring Housing Until the Last Minute
Research the market early.
Planning Only Until Arrival
The first month and first semester need preparation too.
What Nobody Tells You About the Student Visa Journey
The difficult part is not usually one huge task.
It is coordination.
University deadlines.
Immigration.
Financial evidence.
Housing.
Insurance.
Flights.
Document validity.
They all have different timelines.
One may depend on another.
That is why the process can feel more stressful than the individual requirements suggest.
This is also where talking with a recent international student can help.
Ask:
“Which stage took longer than expected?”
“Which document caused the most trouble?”
“What did your first month really cost?”
“When did you start looking for housing?”
“What did you prepare too early?”
“What did you wish you had done before leaving?”
Their experience should not replace formal requirements.
But it can reveal the practical friction behind the process.
Student Visa Journey Checklist
Before Admission
Check passport
Research student immigration requirements
Estimate full budget
Request academic records
Research language requirements
Research housing
After Admission
Confirm final admission conditions
Prepare financial evidence
Check insurance
Prepare immigration documents
Track deadlines
Review document validity
Before Submission
Official requirements rechecked
Documents consistent
Financial evidence correct
Forms reviewed
Copies saved
Timeline realistic
While Waiting
Continue housing research
Protect financial runway
Prepare academic transition
Research local transportation
Avoid unnecessary irreversible commitments
Before Departure
Appropriate approval/status confirmed
Housing plan ready
Insurance ready
Travel arranged
Important documents backed up
First-month budget ready
Arrival checklist prepared
After Arrival
University enrollment completed
Required local formalities handled
Housing stabilized
Banking/phone/transport arranged as needed
Study routine established
Career and language plan started
Conclusion: Prepare for the Journey, Not Just the Visa
The strongest student visa preparation is not about creating the biggest document folder.
It is about making sure each part of the journey connects.
Admission.
Documents.
Money.
Immigration.
Housing.
Insurance.
Travel.
Study.
Career.
Your plan should answer:
What do I need?
When do I need it?
What does it depend on?
What happens if it takes longer?
How much financial margin do I have?
For formal student visa or residence requirements, proof-of-funds rules, insurance conditions, and work rights, always verify current information through the relevant official authorities before acting. Requirements can change, and another student's experience may no longer reflect the current process.
But official checklists are only part of the preparation.
Talk to students who have recently gone through the same journey.
They can help you understand what the timeline actually felt like, what costs appeared unexpectedly, and what they wish they had prepared earlier.
The goal is not simply:
Get the student visa.
The goal is:
Arrive with enough clarity, money, documentation, and preparation to make the education itself successful.
That is the difference between visa preparation and a real student migration plan.
FAQ
When should I start preparing for a student visa journey?
Start researching requirements and organizing stable documents before admission if possible. The exact application timeline depends on the destination, institution, and current official rules.
What documents are commonly needed for a student visa?
Common categories can include a passport, admission documentation, financial evidence, insurance, forms, photographs, academic records, and other country-specific documents.
How much money should I prepare?
Calculate both the official financial requirement and your real budget, including tuition, housing, travel, deposits, living costs, setup, and emergency savings.
Should I book flights before my student visa is approved?
Be cautious with non-refundable commitments while the outcome is uncertain. Your timing should reflect the specific process and level of confirmation you have.
Can I rely on part-time work while studying abroad?
It is safer not to build your entire budget around immediate employment. Student work rights, job availability, language, and study schedules vary.
Should I arrange housing before receiving a visa decision?
Research housing early, but be cautious about expensive or non-refundable commitments before your plans are sufficiently confirmed.
What should I do after receiving my student visa?
Prepare for the entire arrival process: travel, housing, university enrollment, local formalities, insurance, transportation, first-month costs, academic adjustment, and your longer-term career plan.